Setting up Android SDK environment on Linux
Install the Android command line tools. Go to Android Developer and download the tools that match your operating system.
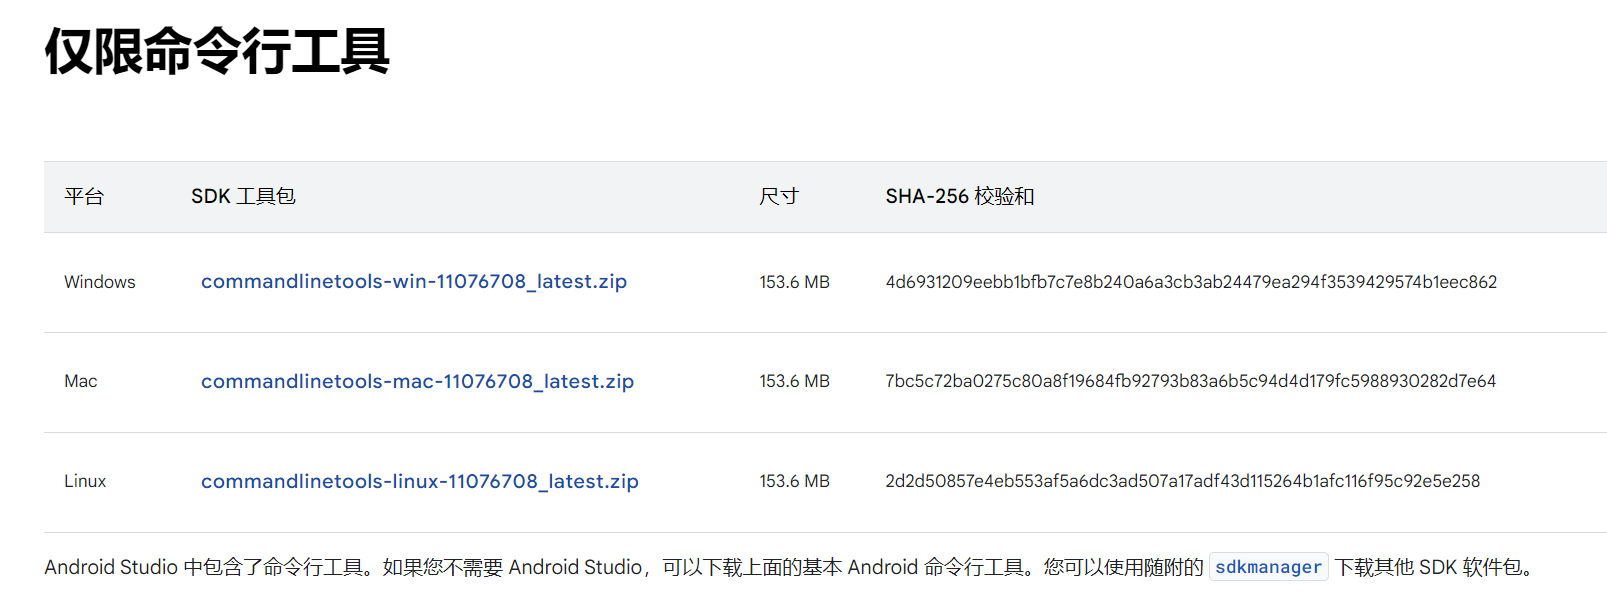 You can use
wgetin the command line to download the tool as a compressed package, or download it from the browser and extract it yourself.You can copy the download link from the above Android Developer website. Then use the following command.
wget https://dl.google.com/android/repository/commandlinetools-linux-11076708_latest.zip?hl=zh-cn
mkdir -p Android/cmdline-tools
unzip commandlinetools-linux-11076708_latest.zip?hl=zh-cn -d Android/cmdline-tools
mv Android/cmdline-tools/cmdline-tools Android/cmdline-tools/latest
Configure the relevant environment.
Install Java. (If you have already installed and configured Java, you need to check if your JDK is compatible with the command line tools. If the versions are compatible, you can skip the following steps regarding Java environment configuration.)
We useJDK-17to run the Android emulator.sudo apt install openjdk-17-jdk
Open your
.bashrcfile.sudo nano ~/.bashrc
Add the following content at the end of the file.
export JAVA_HOME=/usr/lib/jvm/java-17-openjdk-amd64
export PATH=$PATH:$JAVA_HOME/bin
export ANDROID_HOME=$HOME/Android
export PATH="$ANDROID_HOME/emulator:$ANDROID_HOME/tools:$ANDROID_HOME/cmdline-tools/latest/bin:$ANDROID_HOME/tools/bin:$ANDROID_HOME/cmdline-tools/latest:$ANDROID_HOME/platform-tools:$PATH"
Ensure that thePATHconfiguration matches the path where you store the relevant tools.Finally, reload the
.bashrcfile to apply the changes immediately to the current terminal session.source ~/.bashrc
Verify if
sdkmanageris successfully installed. .. code-block:: bashsdkmanager –update sdkmanager –list sdkmanager –licenses
If you receive the following information, the installation was successful.

You can learn more from the Common Commands of sdkmanager.
Common Issues with WSL
1. WSL Dependencies
Please upgrade your Windows to Win11 and use WSL 2. This will resolve most WSL issues in Win10 and WSL 1.
2. WSL PATH Settings
By default, WSL shares environment variables from the Windows system. Sometimes this can lead to incorrect behavior. You may find that the actual executable file you are using is not the one found through the which command. The root cause of this issue is that the which command in WSL can only find executable files in the WSL PATH. However, if you configure an executable file (e.g., python3) in both Windows PATH and WSL PATH, and the Windows PATH is set before the WSL PATH (PATH=$Windows_PATH:$WSL_PATH). Then the actual executable file you are using is the one from Windows_PATH. But the one you find through which is from WSL_PATH.
To resolve this issue, you can follow these suggestions:
Place your environment PATH at the front when setting up PATH
Use
PATH=New_PATH:$PATHinstead ofPATH=$PATH:New_PATH. This is a good practice that prioritizes your latest settings and ensures they always work.Disable the sharing of environment variables
# WSL bash
sudo vim /etc/wsl.conf

# 添加以下内容
[interop]
appendWindowsPath = false

# 在 PowerShell 中重启 WSL
wsl --shutdown
3. CPU Hardware Acceleration Issues
Error
该用户没有使用 KVM (/dev/kvm) 的权限,错误:x86 模拟目前需要硬件加速!
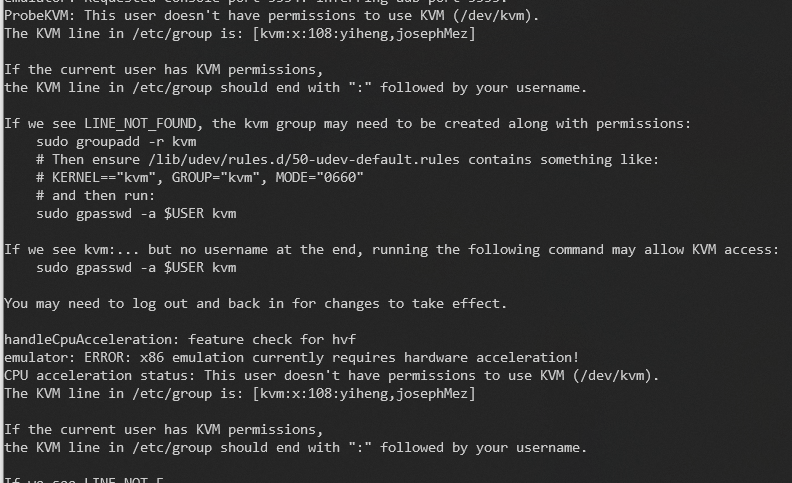
Please follow the first solution in Stack Overflow - Android Studio: /dev/kvm device permission denied. Then log out and log back into Linux.
sudo adduser $USER kvm
sudo chown $USER -R /dev/kvm